How To Install Floating Shelves
One of the biggest benefits of purchasing a real wood Floating Shelf Kit from Dakota TImber Co. is that installation can be done in minutes with our innovative, flush-mount bracket system.
If you purchased a floating shelf kit from us, you should have received the Installation Guide. If you need a copy, you can find it HERE.
Our floating hardware is rated for up to a 150 pound load when (6) screws are attached stud-direct. These flush-mount shelf brackets are made in the USA and come ready to install on any wall. hey are automatically included with your floating shelf kit. We also sell our floating shelf brackets separately if you are just looking for the hardware.
For shelf installation steps, please follow along below:
YOU WILL NEED:
- Stud Finder
- Pencil
- Level
- #2 Square Bit
- Included Screws
- Power Drill
- Construction Adhesive

BEFORE YOU BEGIN:
Determine the placement of your floating shelf/shelves and read through the incldued guide in its entirety. If you need help visualizing the placement of your shelf/shelves we recommend marking their lengths out in masking tape on your wall.
STEP 1: Find your stud and mark stud locations on your wall.
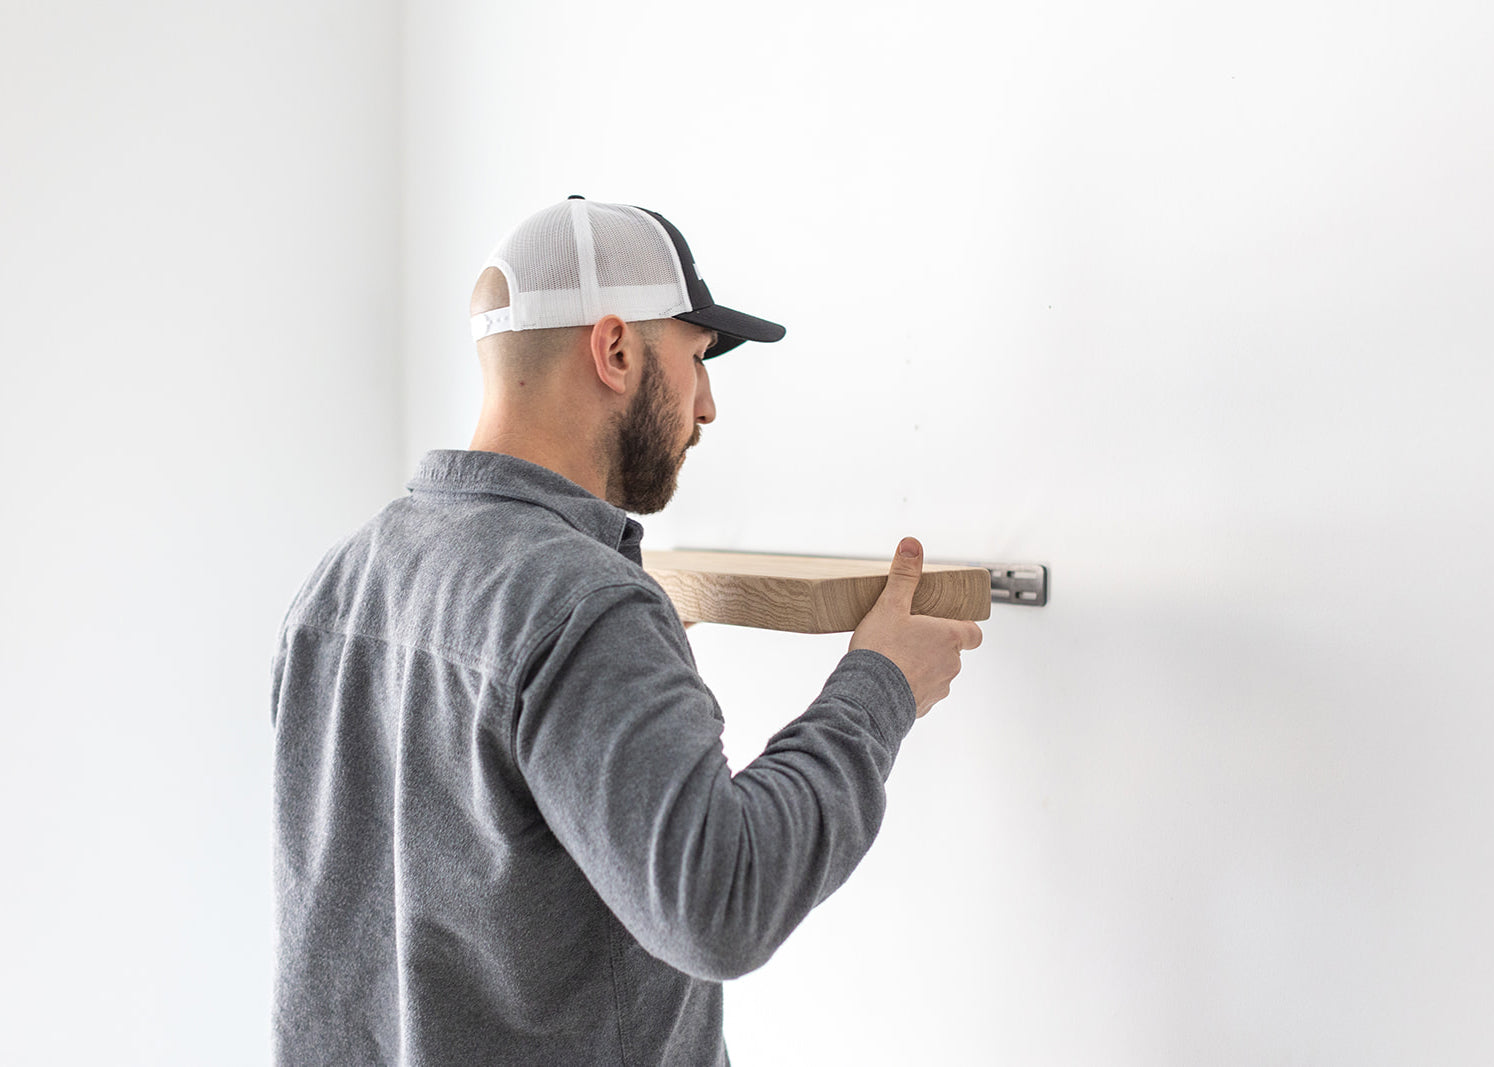
STEP 2: Place bracket on the wall at desired location and check for level.
STEP 3: Once level, use provided screws and drive into stud locations - 2 screws per stud location is recommended.

STEP 4: (Optional) If you are looking for a more permanent / solid installation, you can simply add a small amount of construction adhesive into the bracket holes on your shelf before you slide onto the bracket.
STEP 5: With firm, even pressure slide the shelf onto the bracket. You're done!


Video Tutorial:
If you are interested in our Floating Shelf Kits, please feel free to check out our Wood Floating Shelf Kits page. In addition to selling individual kits online, we also accept custom, wholesale and commercial shelf orders. If you are interested in learning more, please email info@dakotatimberco.com